As with many high quality gun cases on the market, my new Starlight gun case requires the user to cut out the foam insert(s) to achieve a custom fit for your firearm and accessories. Simple enough, right? Well, maybe. But I’ll admit, I put off this task for a couple of weeks. Why the procrastination? It’s simple… I’ve seen several examples of gun case foam that, once cut, looks terrible.
While researching the process, I found a lot of good examples of gun case foam that was cut via electric carving knives and hot wires. But since my ultimate goal is to review this Starlight gun case, I decided that following the manufacturer’s instructions was more appropriate.
Side note: This is a really nice gun case. I can only imagine that the final review will be extremely positive, except for one thing… the foam fitting instructions. I think purchasers of this case would definitely appreciate a better laid out set of instructions.
Before I walk you through my foam cutting experience, I’ll go ahead and tell you that I would give my final results a C+, maybe a B-. But the important thing is that this experience has shown me what I need to do to get much better results the next time. Pay special attention to the mistakes that are mentioned in the cutting section!
Foam Fitting Instructions for Rifle Cases

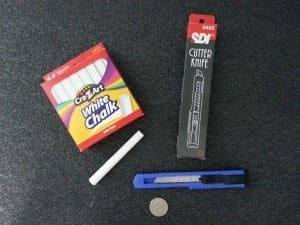
Items Needed:
- Chalk
- Snap-off Blade Knife (9mm) – one is provided by Starlight Cases, but I recommend having a couple of extras on hand
- Coin – I used a Nickel

Step 1 – Position
Remove the foam insert from the rifle case. Position your firearm and accessories in the desired position on the foam. Be sure to leave a minimum of 1 inch between each item and the edges of the foam.
Step 2 – Outline
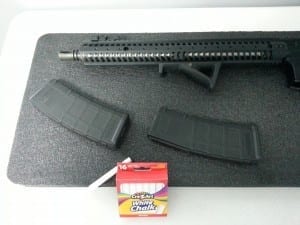
Using chalk, outline the rifle and accessories. Once the items are outlined, remove them from the foam.
Note: When I first tried to use chalk on the foam, it did not show up. However, after rubbing the chalk on the foam a few times, it will begin to show up.
Note: You can use a Sharpie instead of chalk, but your lines may end up showing after the foam is cut. Chalk can be easily wiped off after cutting is complete.
Note: You may want to add finger holes next to some accessories to make removing those items from the case easier. After the initial trace, lay a nickel anywhere you would like to include a finger hole and outline it with chalk.
Step 3 – Cutting
Using the 9mm snap-off blade knife, cut along the chalk outline. Be sure to cut completely through the foam! Keep the knife at a 90 degree angle from the foam and avoid the “sawing” motion. The goal is to make solid, straight cuts. Take your time!
Mistake #1: When cutting through the foam, I had it positioned on a plastic table. While cutting, it felt as if the blade was going all the way through, but it was not. Because of this, I had to make a second pass to complete the cut. This second pass caused my cut lines to be jagged. To avoid this, I recommend holding the portion of the foam that is being cut off of the table. This will allow you to be sure the blade is going all the way through.
Mistake #2: While cutting around a corner, I broke the 9mm snap-off blade knife. I then used a snap-off blade knife with a larger blade. Big mistake! The larger blade made corners very difficult, and the final results show it. Be sure to have a few extra 9mm snap-off blade knives!
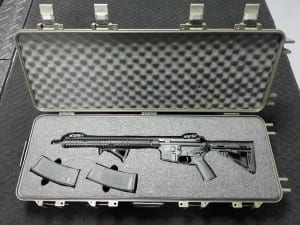
And the final results…

In summary, the process really is easy if you take your time and use the correct tools. This particular case has a second layer of foam to accommodate additional firearms. Based on what I learned this time around, I’m confident my next attempt will turn out even better.
Be sure to visit Starlight Cases to learn more about their products!
The rifle shown is a KVD-15 from Kavod Custom. Additions to the rifle include Midwest Industries SPLP Sights and a Magpul Angled Fore Grip (AFG2).
